From HP-SEE Wiki
This guide is meant to be used as a quick guide to get you started with creating survey in IPB Survey tool. It will explain how to login and create simple survey, covering several basic types of answer format. If you need a more detailed guide, please visit LimeSurvey Documentation Wiki.
You can see this survey at http://survey.ipb.ac.rs/index.php?sid=74674&newtest=Y&lang=en.
The list of currently active HP-SEE surveys can be found here.
To complete the survey, simply select it in the list and follow the onscreen instructions.
Each survey consists of general description, display settings and, of course, questions. A survey requires each question to be a member of a group (and only that group). It will also describe how to preview your survey and how to publish it.
IPB Survey Admin Page
|
For adding new survey or modifying existent survey, you need to visit IPB Survey Admin Page.
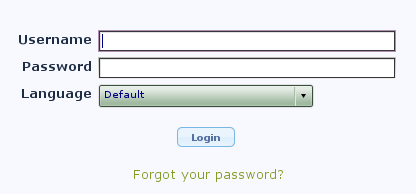
On the first page you have to enter your login information. Here you can select the language in which Survey Admin Tool will be displayed to you. Default language is English (used in this guide).
If you don't have an account yet, send an email to Dusan Vudragovic.
|
|
|
Creating Survey: HPC School feedback
|
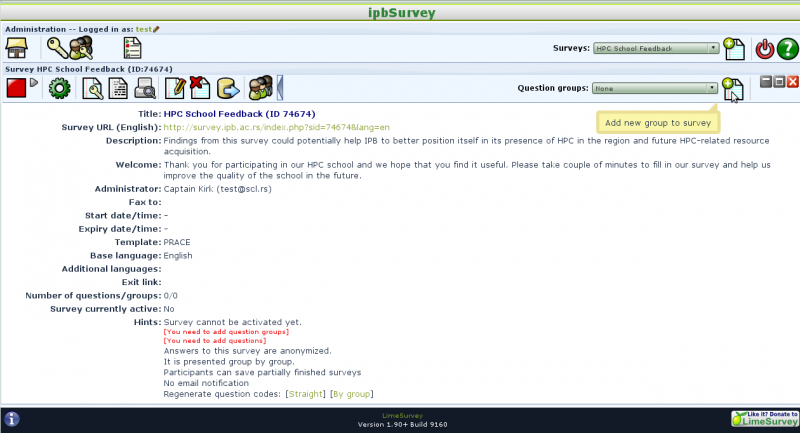
Now you arrived at the welcome page from which you can create new survey. Just click on the icon in the right part of the toolbar (as indicated on the picture below).
|
|

|
|
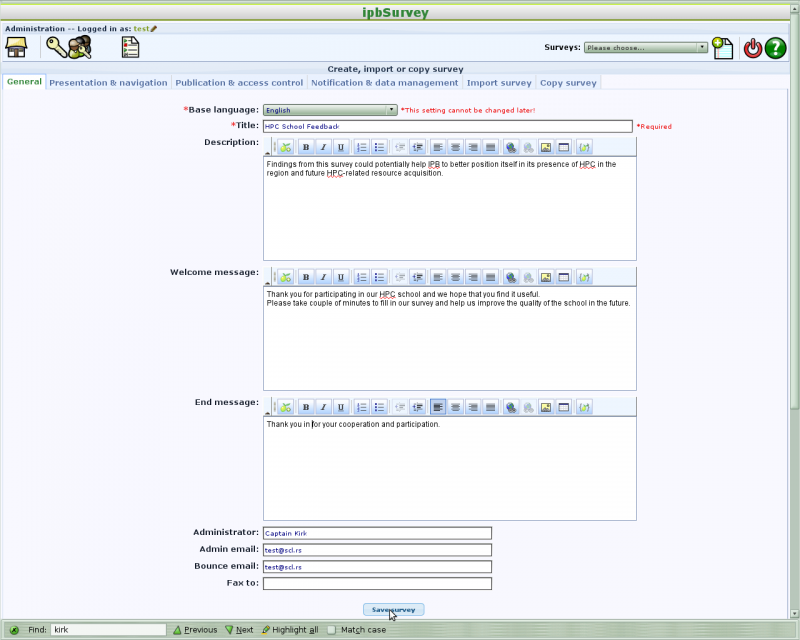
This click lead you to a page where you can describe your Survey. Survey description is divided in several tabs.
- Fill in:
- Title of the survey: HPC School feedback
- Description (will be displayed on every page of the survey)
- Welcome message
- End message
- Click "Save survey"
|
|
|
Question group: General Information
|
Each survey must contain at least one question group. Our survey will contain 3 groups of questions, first one being "General Information"
- Add new question group (right side of "Survey" toolbar)
|
|
|
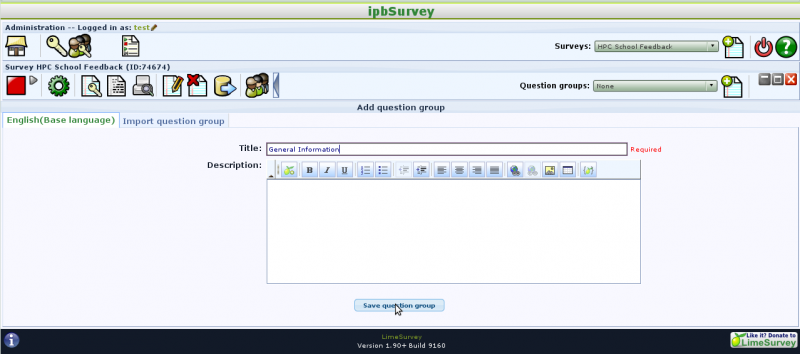
- Enter question group title: General Information
- Click "Save question group"
|
|
|
Question type: Multiple short text
|
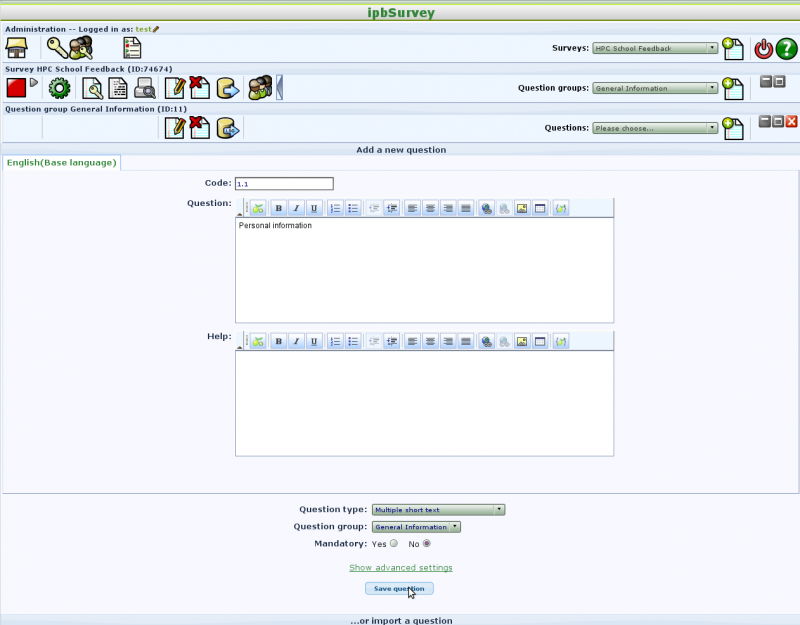
Now we want to create new question, to ask for personal information (name, institution, e-mail)
- Add new question (right side of the "Question Group" toolbar)
|
|
|
- Enter
- Code (mandatory): 1.1
- Question: Personal Information
- Question type: Multiple short text (we want several different fields for name, institution, etc.)
- Click "Save question"
|
|
|
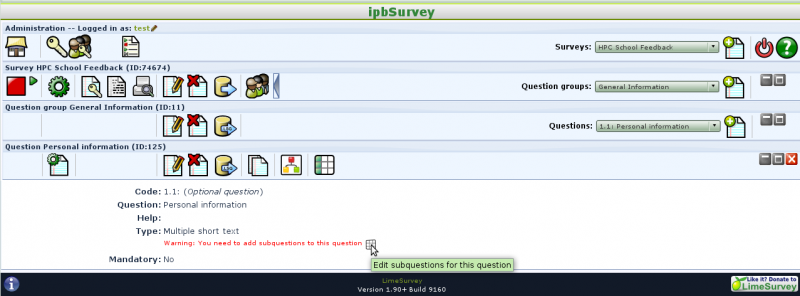
Now we need to enter subquestions
- Click on "Edit subquestion for this question" icon
|
|
|
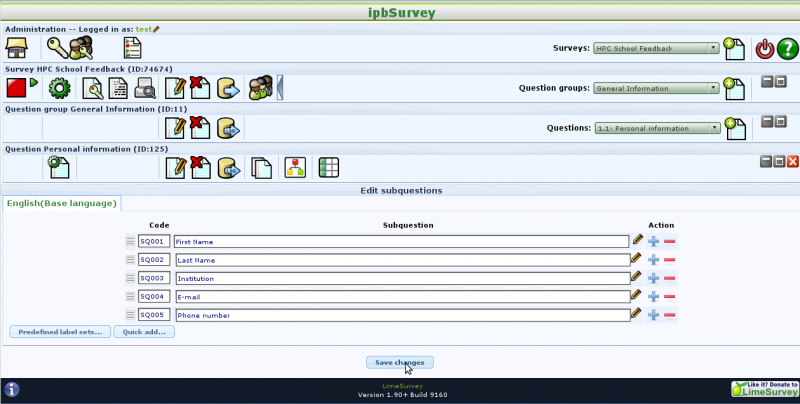
- Enter first subquestion: First name
- Add new subquestion by clicking on the plus sign on the right side of subquestion (under "Action")
- Continue entering subquestions
- Click save changes
|
|
|
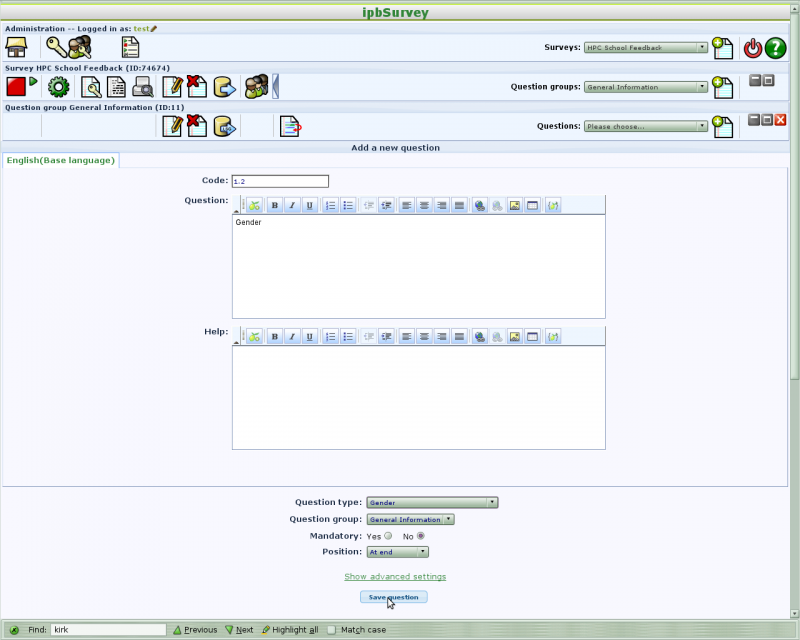
Question type: Gender
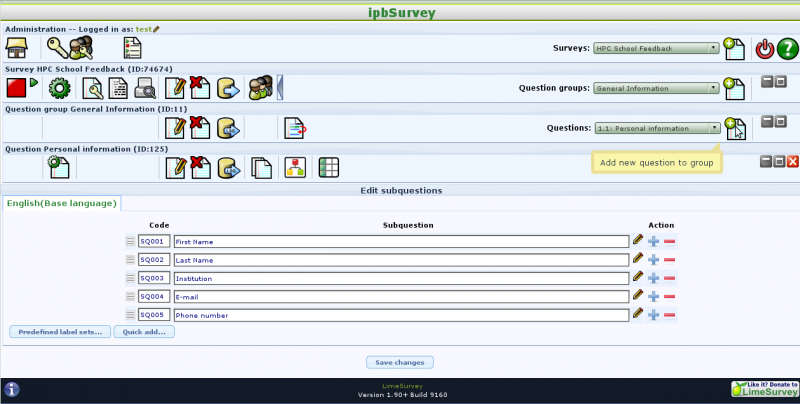
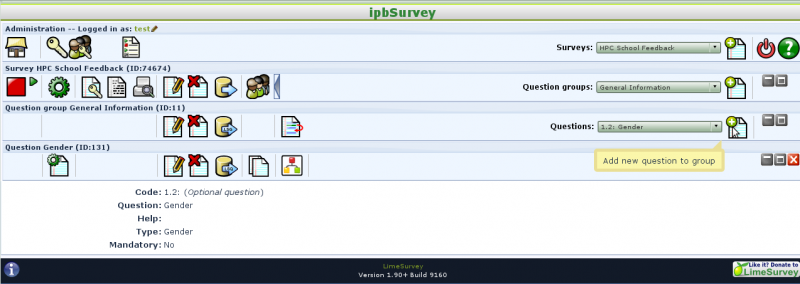
- Add new question (click on "Add new question to group" icon)
|
|
|
- Enter
- Code (mandatory): 1.2
- Question: Gender
- Question type: Gender
- Click "Save question"
|
|
|
Question type: Date
- Add new question (click on "Add new question to group" icon)
|
|
|
- Enter
- Code (mandatory): 1.3
- Question: Birth Date
- Question type: Date
- Click "Save question"
|
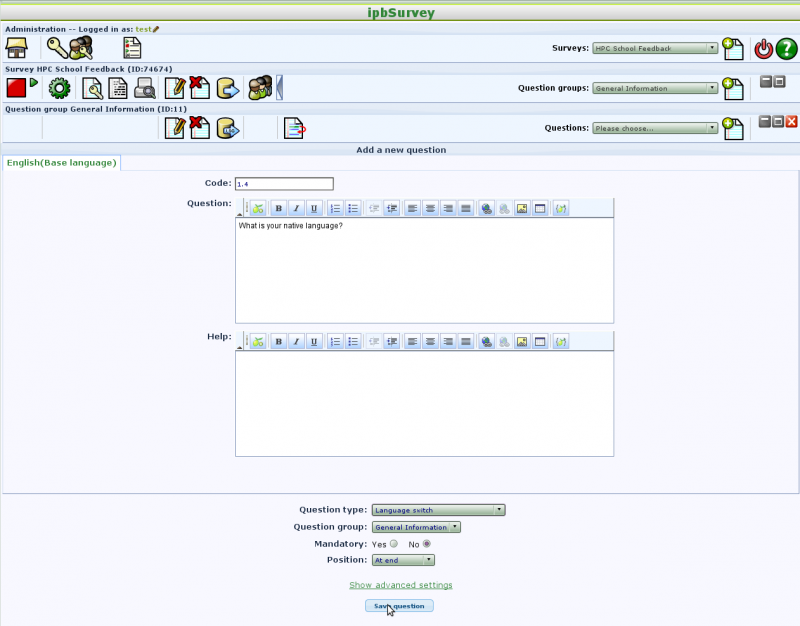
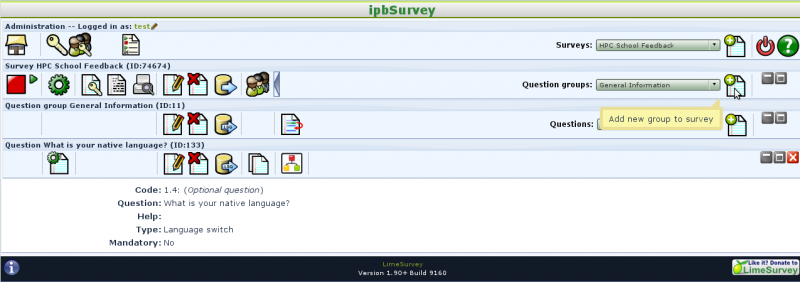
Question type: Language switch
- Add new question (click on "Add new question to group" icon)
- Enter
- Code (mandatory): 1.4
- Question: What is your native language
- Question type: Language switch
- Click "Save question"
|
|
|
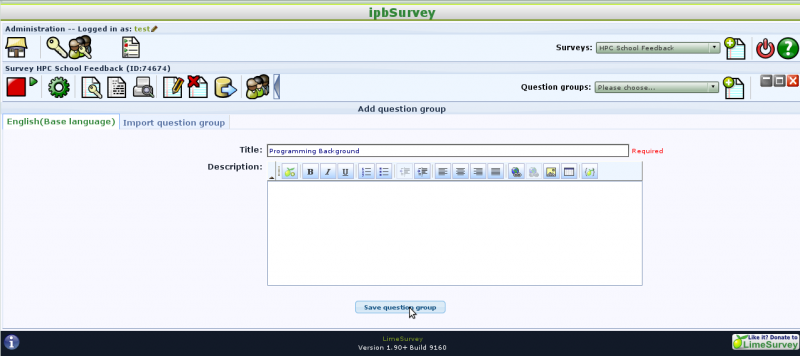
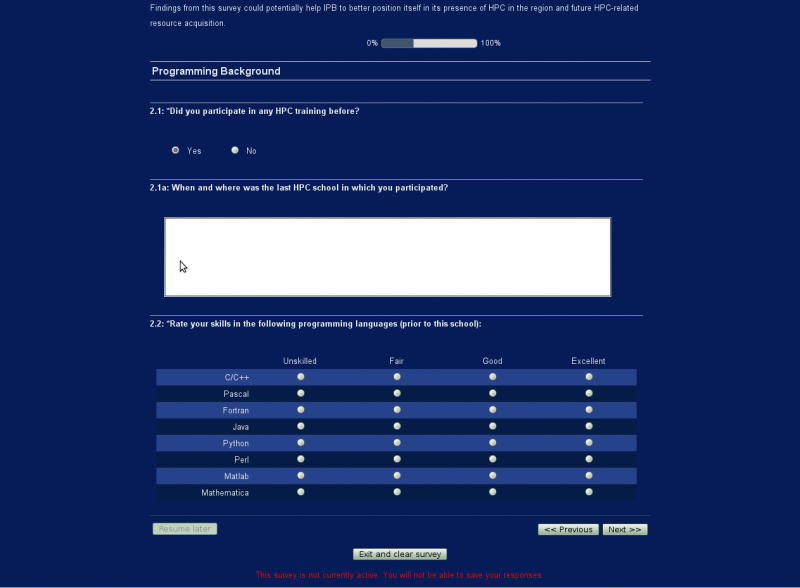
Question group: Programming Background
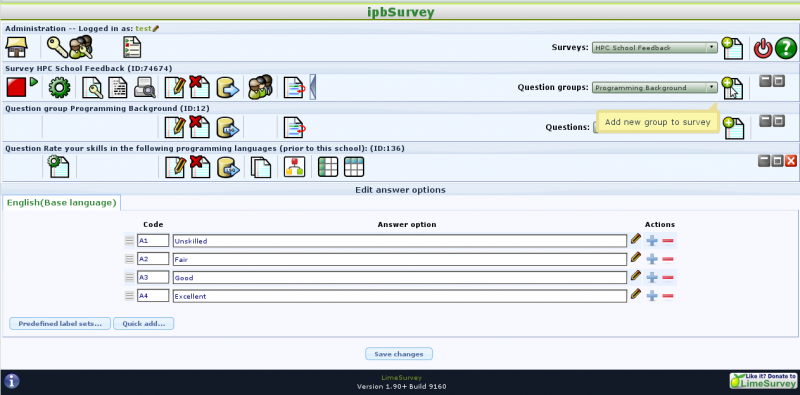
- Add new question (click on "Add new group to survey" icon)
|
|
|
- Enter question group title: Programming Background
- Click "Save question group"
|
|
|
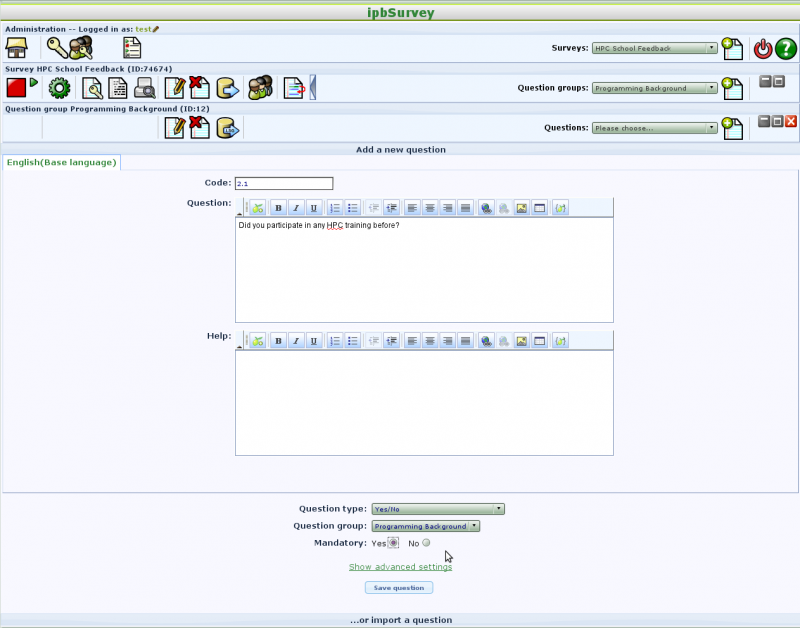
Question type: Yes/No
- Enter
- Code (mandatory): 2.1
- Question: Did you participate in any HPC training before?
- Question type: Yes/No
- Mandatory: Yes
- Click "Save question"
|
|
|
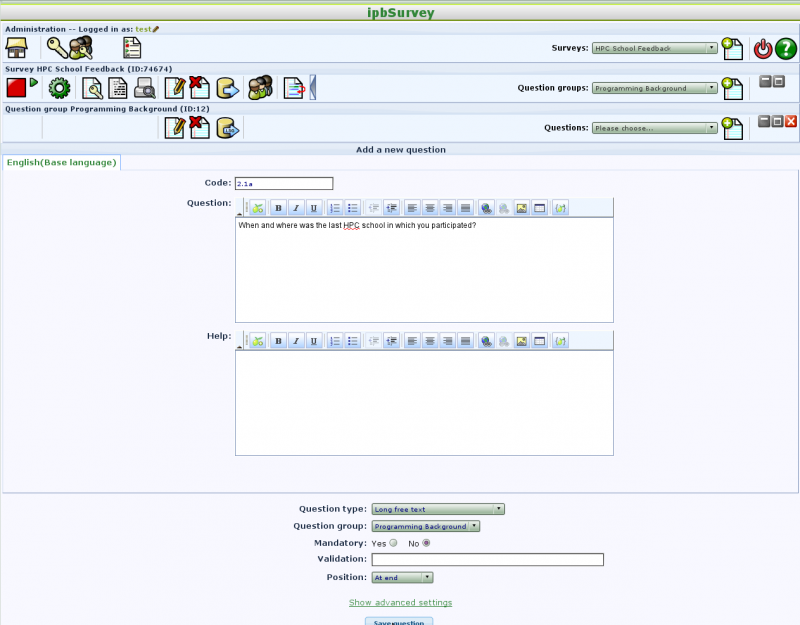
Question type: Long free text; Conditional
- Enter
- Code (mandatory): 2.1a
- Question: When and where was the last HPC school in which you participated?
- Question type: Long free text
- Click "Save question"
|
|
|
|
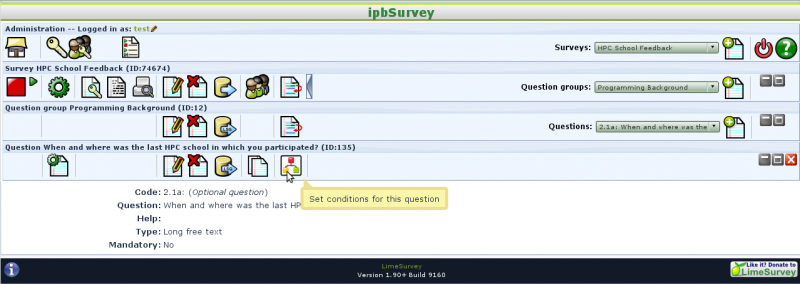
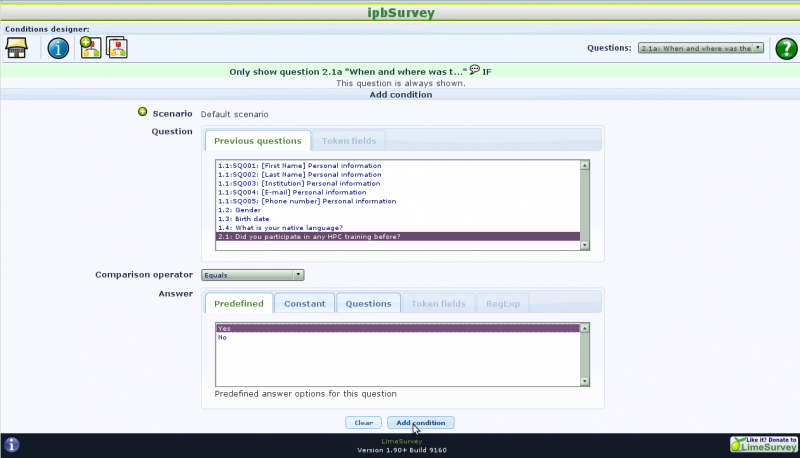
Last question only makes sense if the answer to question 2.1 was "Yes". We want to hide this question if the answer was "No". We do this by setting conditions.
- Click on "Set conditions for this question"
|
|
|
- In the "Previous questions" tab of the "Question" section select question 2.1
- Set comparison operator to "Equals"
- In "Predefined" tab of "Answer" section select "Yes"
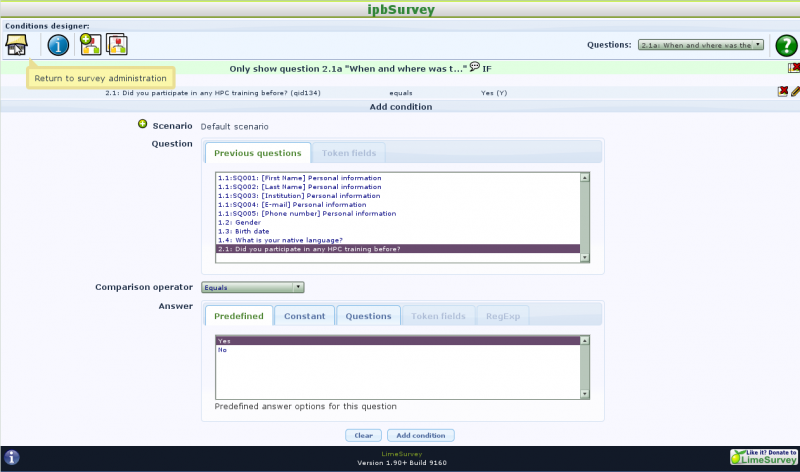
- Click on "Add condition"
|
|
|
- Click on the house icon in the upper left corner to "Return to survey administration"
- Continue adding question by clicking on the "Add new question to group" icon in the Question group toolbar
|
|
|
Question type: Array
- Enter
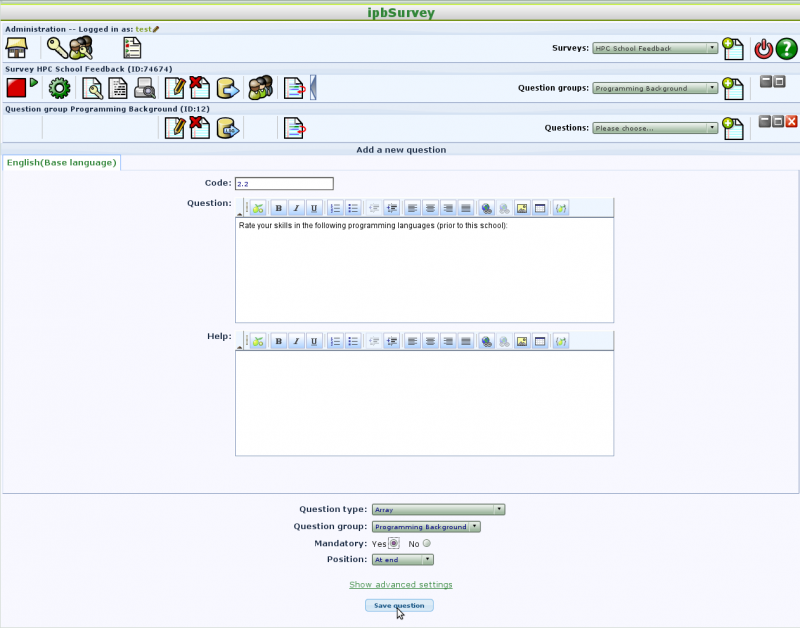
- Code (mandatory): 2.2
- Question: Rate your skills in the following programming languages (prior to this school)
- Question type: Array
- Mandatory: "Yes" (to avoid the "No answer" column)
- Click "Save question"
|
|
|
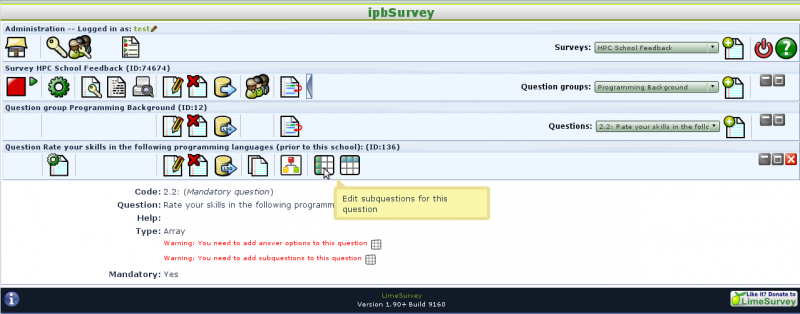
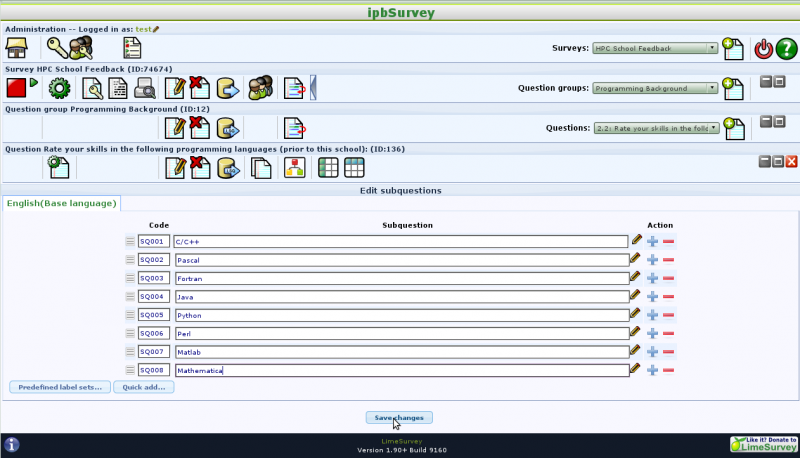
- Click on "Edit subquestions for this question"
|
|
|
- Add necessary number of subquestion fields (take care that all codes are different)
- Fill in the subquestions
- Click "Save changes"
|
|
|
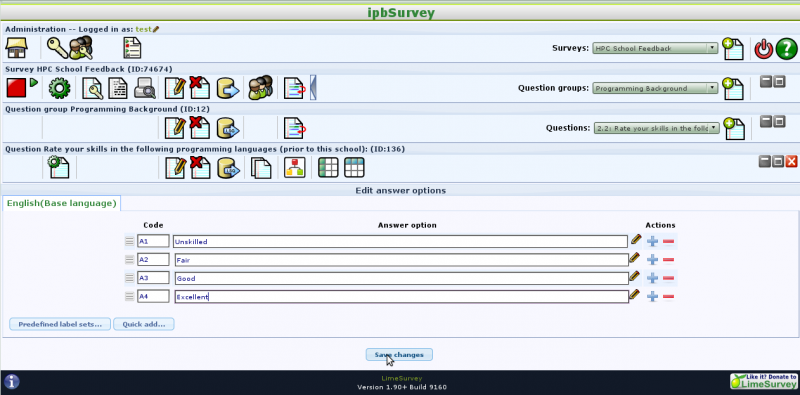
- Click on "Edit answer options for this question" icon (on the right from "Edit subquestions for this question")
- Add necessary number of answer fields (take care that all codes are different)
- Fill in the answer options
- Click "Save changes"
|
|
|
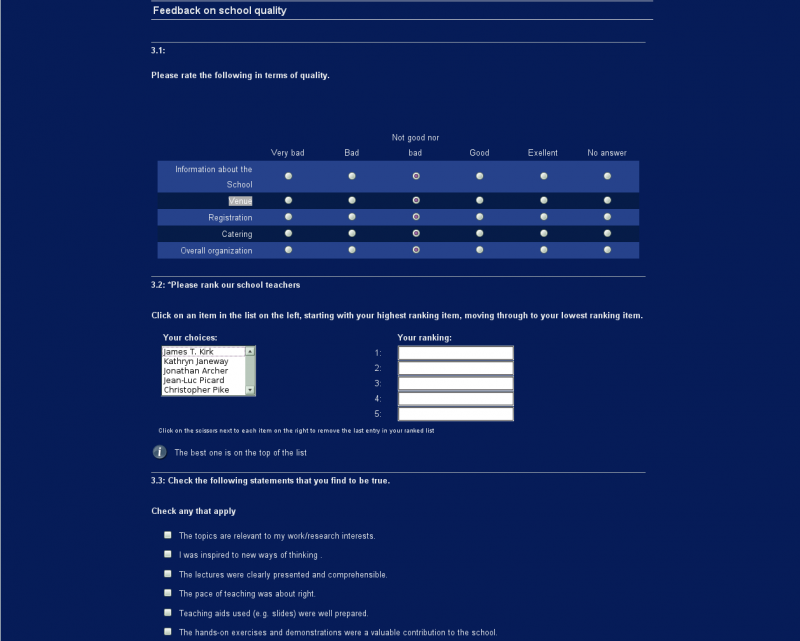
Question group: Feedback on school quality
- Click "Add new group to survey" in the survey toolbar
|
|
|
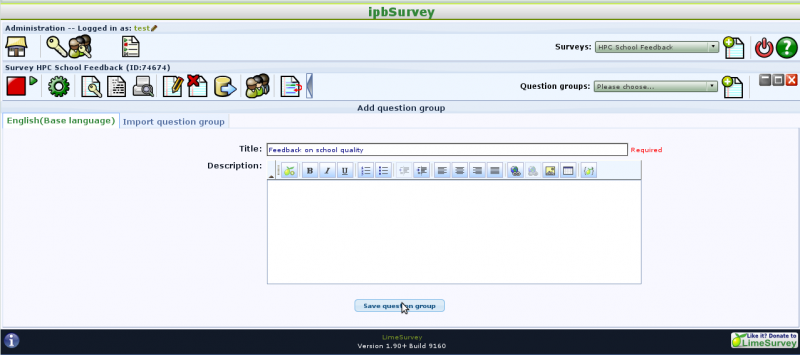
- Enter question group title: Feedback on school quality
- Click "Save question group"
|
Question type: Array
|
|
- Click on "Add new question to group" icon
|
|
|
- Enter
- Code (mandatory): 3.1
- Question: Please rate the following in terms of quality.
- Question type: Array
- Mandatory: "Yes" (to avoid the "No answer" column)
- Click "Save question"
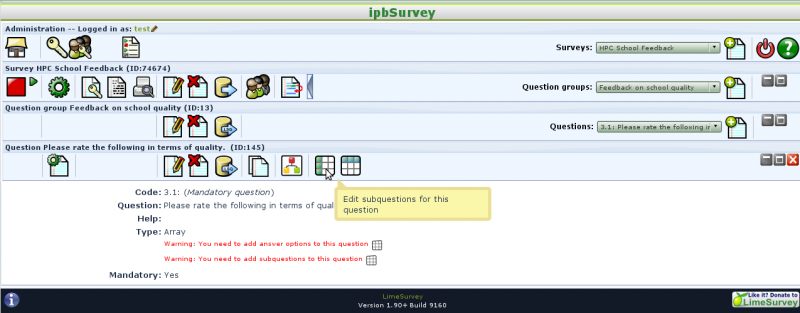
- Click "Edit subquestion for this question"
|
|
|
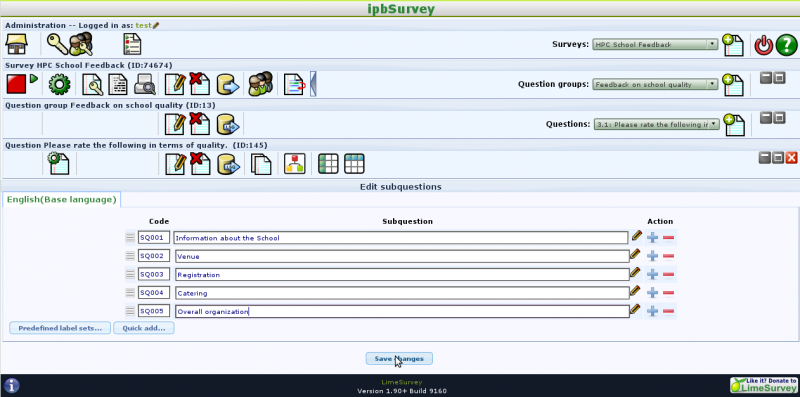
- Add all subquestions
- Click "Save changes"
|
|
|
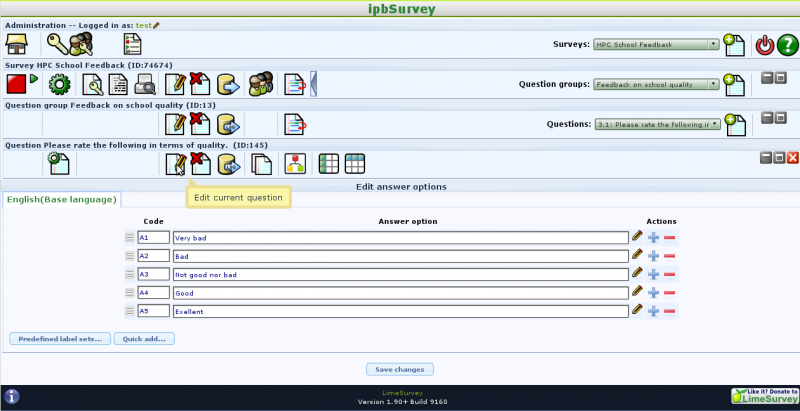
- Add all answer options
- Click "Save Changes"
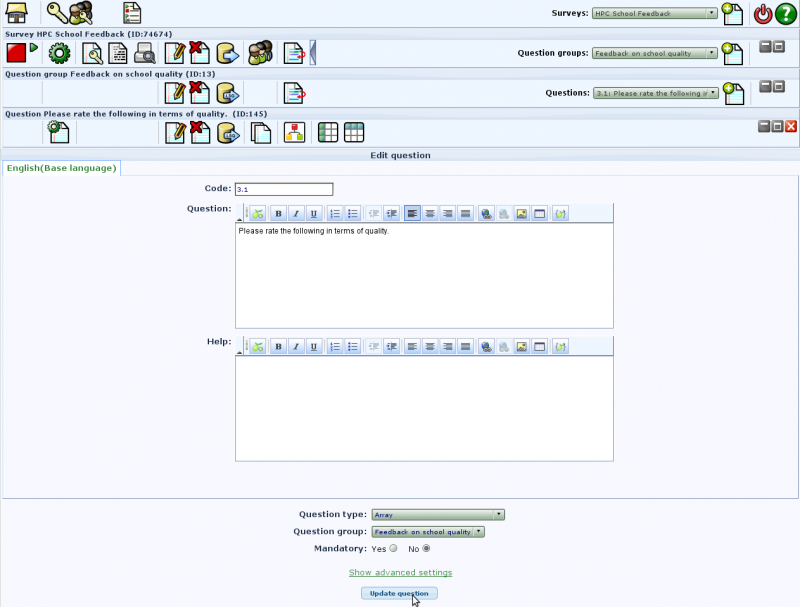
I set this question to be mandatory, but now I've changed my mind and want to edit it.
- Click "Edit current question" in the question toolbar
|
|
|
- Make necessary changes (switch "Mandatory" from "Yes" to "No")
- Click "Update question"
|
|
|
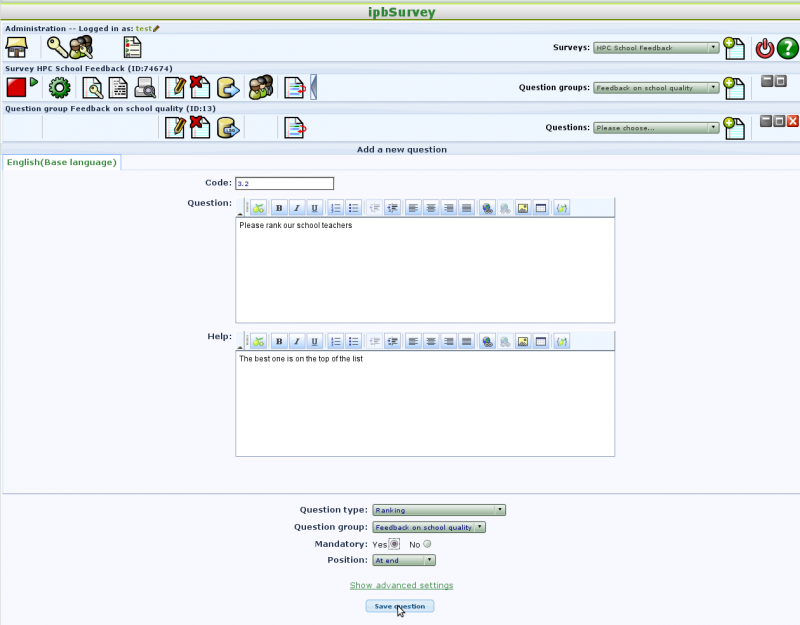
Question type: Ranking
- Enter
- Code (mandatory): 3.2
- Question: Please rank our school teachers
- Question type: Ranking
- Mandatory: "Yes"
- Click "Save question"
|
|
|
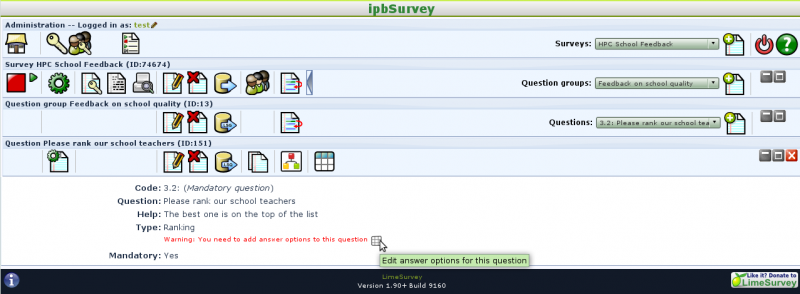
- Click "Edit answer options for this question"
|
|
|
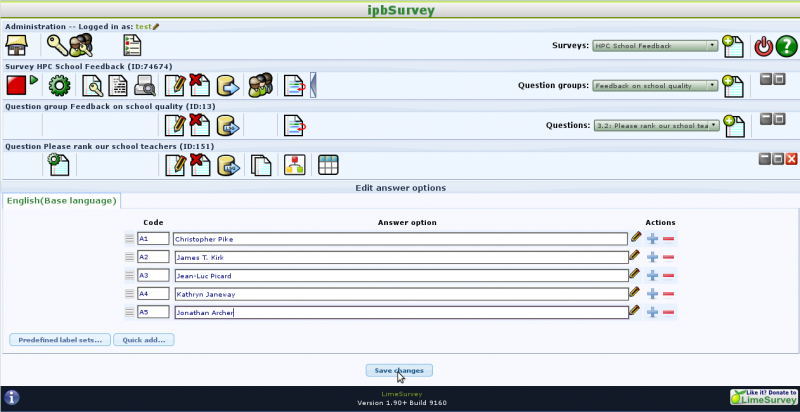
- Add all answer options (teacher names)
- Click "Save changes"
|
|
|
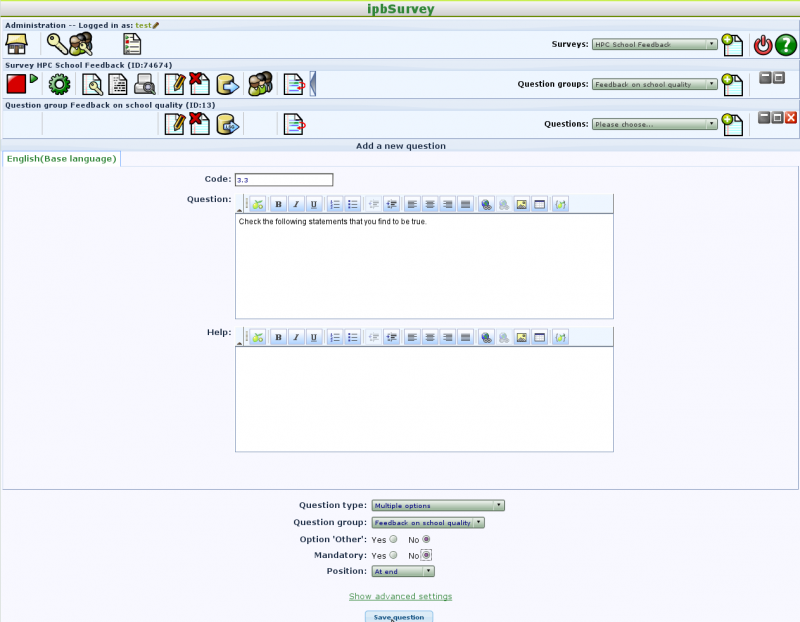
Question type: Multiple Options
- Enter
- Code (mandatory): 3.3
- Question: Check the following statements that you find to be true.
- Question type: Multiple Options
- Click "Save question"
|
|
|
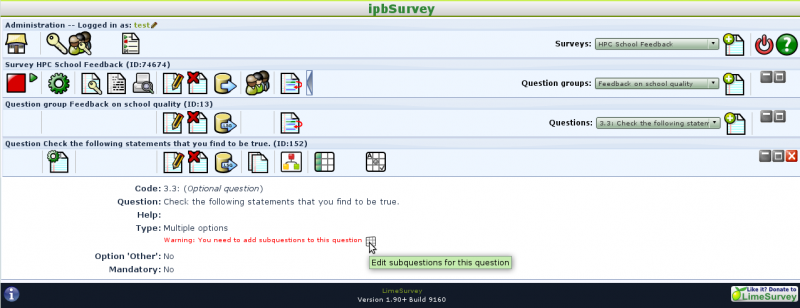
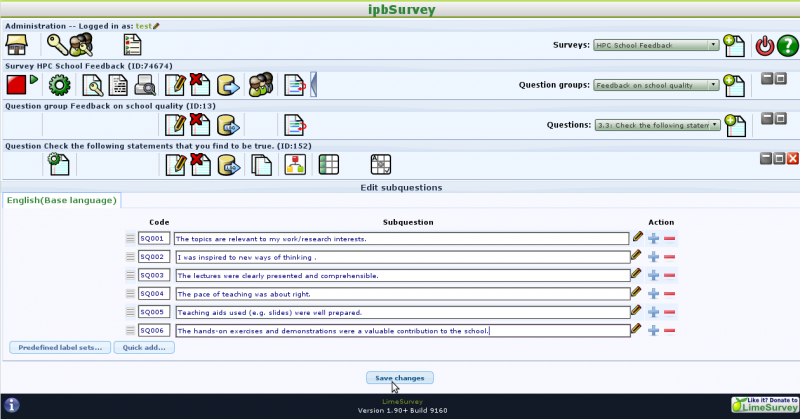
- Click "Edit subquestion for this question"
|
|
|
- Add all subquestions
- Click "Save changes"
|
|
|
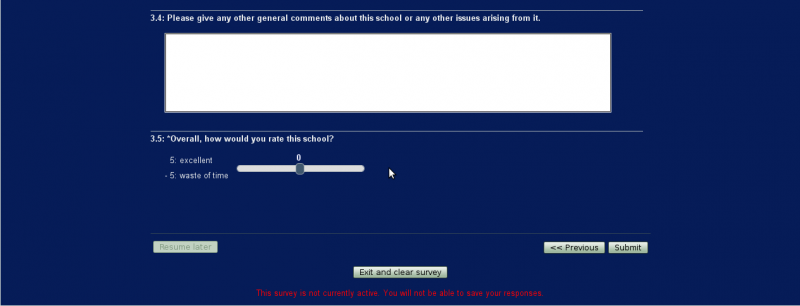
Question type: Long free text
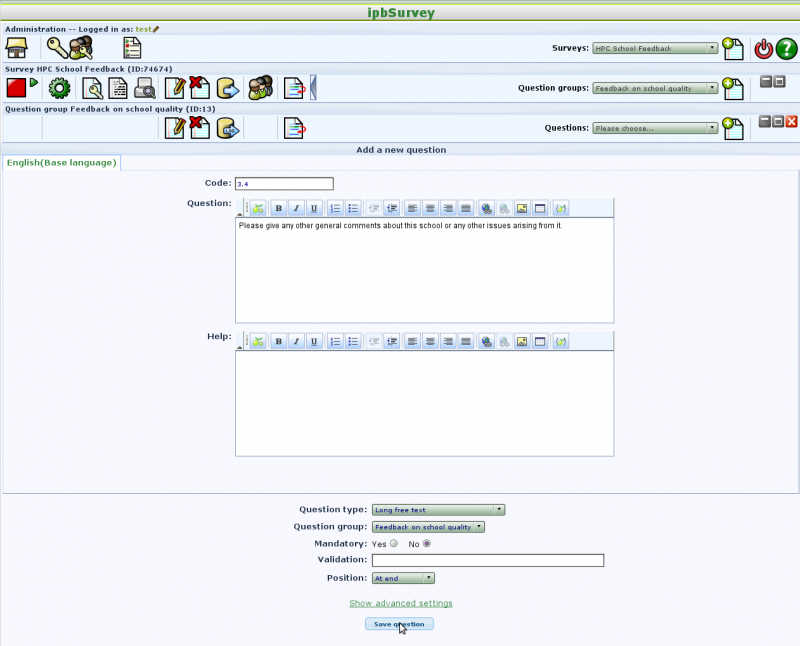
- Enter
- Code (mandatory): 3.4
- Question: Please give any other general comments about this school or any other issues arising from it.
- Question type: Long free text
- Click "Save question"
|
|
|
Question type: Multiple numerical input with Slider
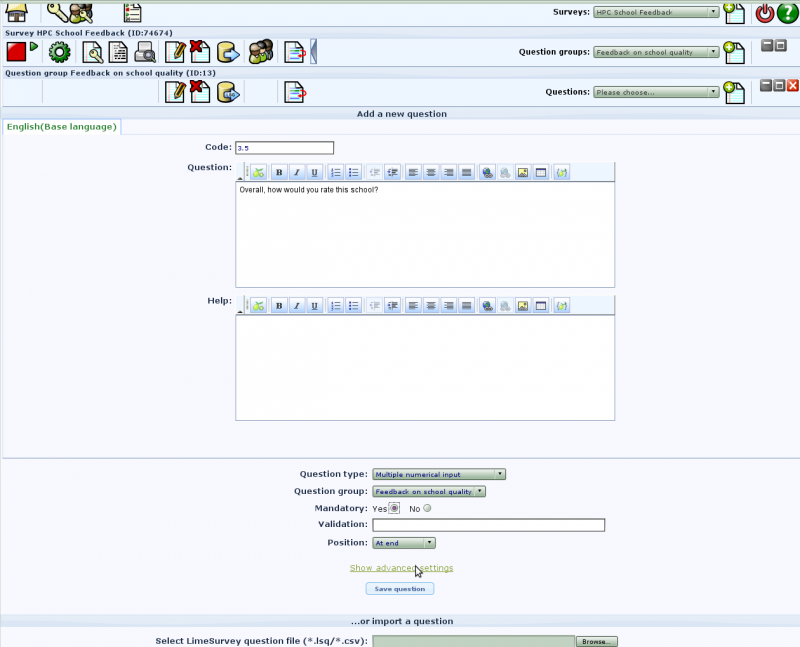
- Enter
- Code (mandatory): 3.5
- Question: Overall, how would you rate this school?
- Question type: Multiple numerical input
- Mandatory: Yes
We now want to use slider to enter numerical answer, and to set minimum an maximum value. We do this by changing the advanced settings.
- Click on the "Show advanced settings"
|
|
|
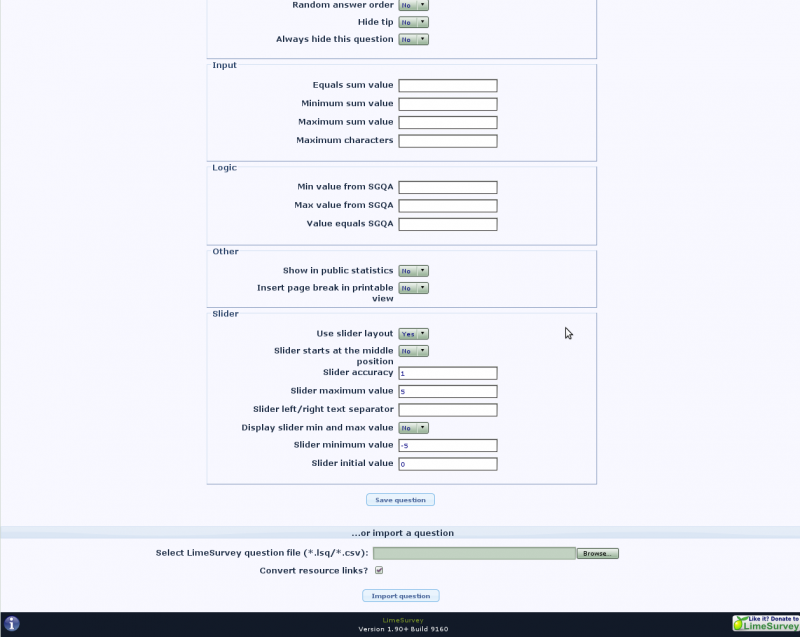
- Scroll down to "Slider" section
- Enter
- Use slider layout: Yes
- Slider accuracy: 1
- Slider maximum value: 5
- Slider minimum value: -5
- Slider initial value: 0
- Click "Save question"
|
|
|
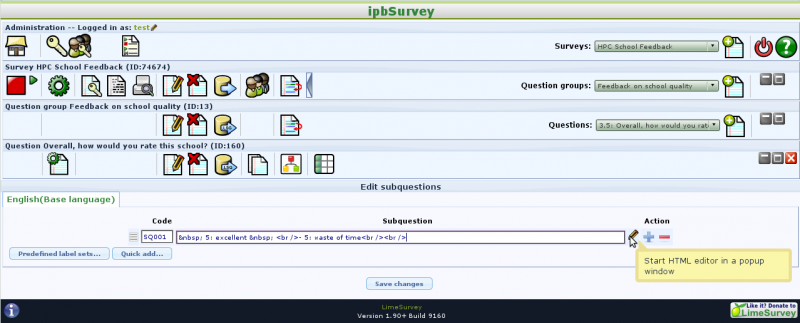
- Click "Edit subquestion for this question" in the "Question" toolbar
We want this subquestion to be displayed in 2 rows
- Click on "Start HTML editor in the popup window" icon (pen shaped icon on the right of subquestion field)
|
|
|
- Enter subquestion in a popup window
- Click on "Save" icon (upper left corner) when finished
- Click "Save changes" to save your subquestion
|
|
|
Testing survey
|
We now finished with our survey. It is time to test it!
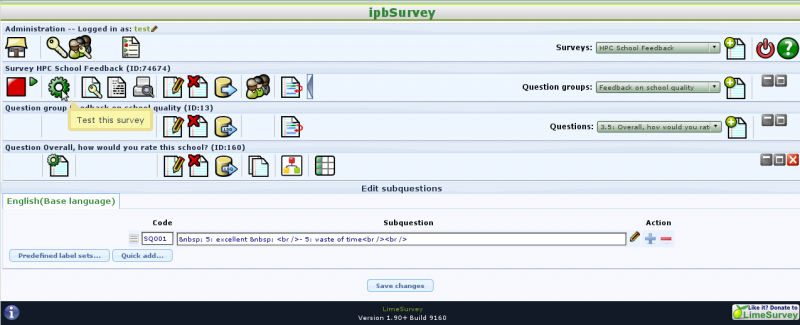
- Click "Test this survey" icon in the "Survey" toolbar
|
|
|
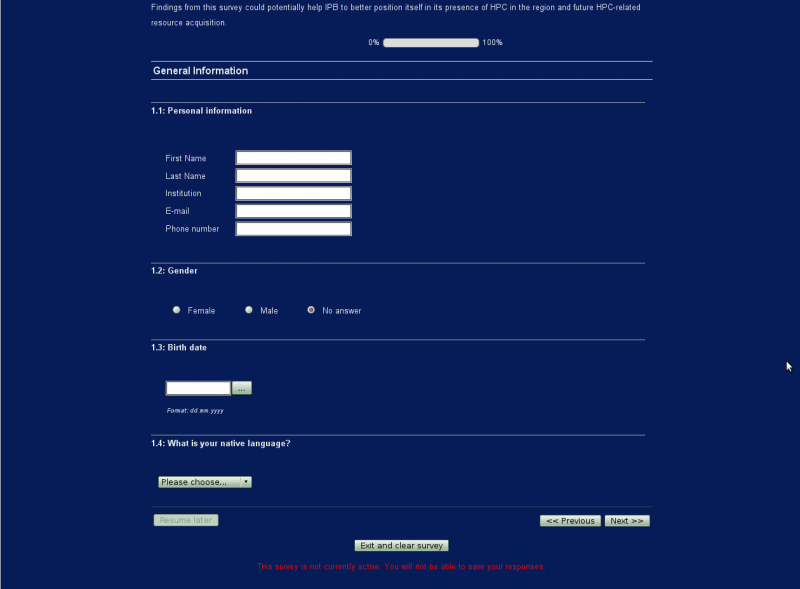
Now we can see our survey, the way it will be displayed to participants. Take a careful look to make sure everything is the way you want it.
|
|
|
|
|
|
|
|
Editing questions
|
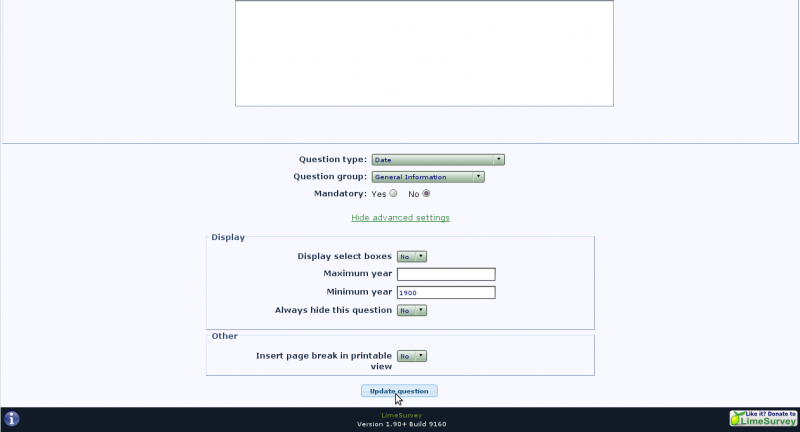
We found an error. The birth date question is displaying years starting from 1980, and our participants could be older. We need to edit that question.
- Select "General Information" in the "Question groups" dropdown menu of the "Survey" toolbar
- Select "1.3: Birth date" in the "Question" dropdown menu of the "Question group" toolbar
- Click "Edit current question" icon in the "Question" toolbar
|
|
|
- Scroll down and click "Show advanced settings"
- In the "Display" section, enter
- Click: Update question
|
|
|
|
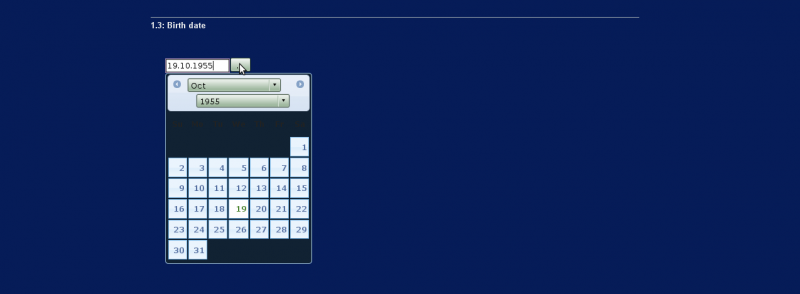
Now let's check if it is good this time. Instead of testing the whole survey, we only test this question.
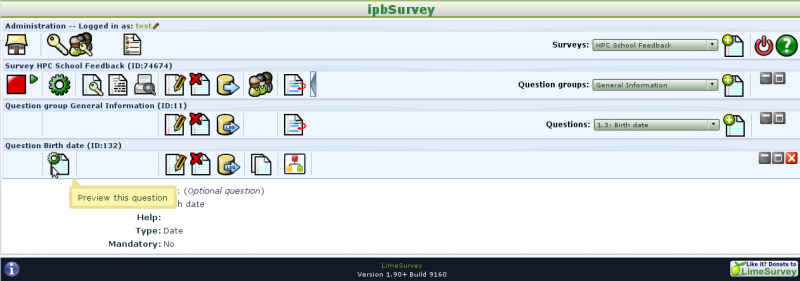
- Click on "Preview this question" icon in the "Question" toolbar
|
|
|
| Now it's good.
|
|
|
Activate survey
|
After we tested the survey once again and made sure everything is the way we want it to be, we need to activate the survey. We can do this at a later time if we prepared this survey in advance and we are waiting for the course to end in order to activate the survay.
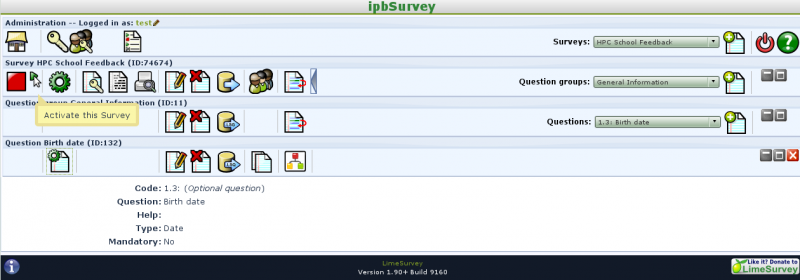
- Click on the "Activate the survey" icon (first on the left) in the "Survey" toolbar
|
|
|
|
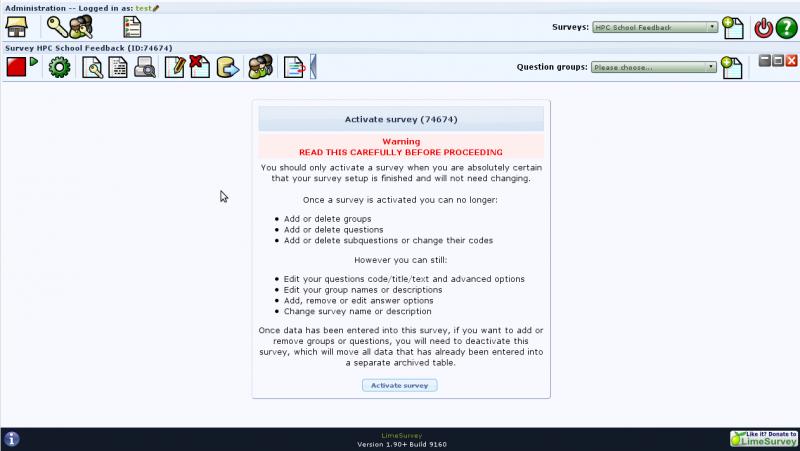
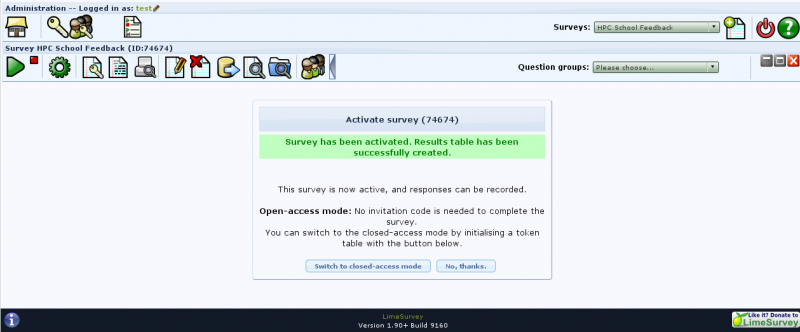
A warning will be displayed, to ask you if you are sure you want to activate this survey. Beware, once the survey is activated, some thing cannot be changed.
- Click "Activate survey" button
|
|
|
Access Mode
|
The survey is now activated and you can send the link to your participants. However, you may decide that not everyone who has this link can fill in your survey as many times as you like. If you want to send one personalized link per participant, you can do that by using tokens and click to "Switch to closed-access mode". Details of closed-access mode are out of scope of this guide. Find more information in LimeSurvey Documentation.
To create free-access survey:
|
|
|
Distribute link
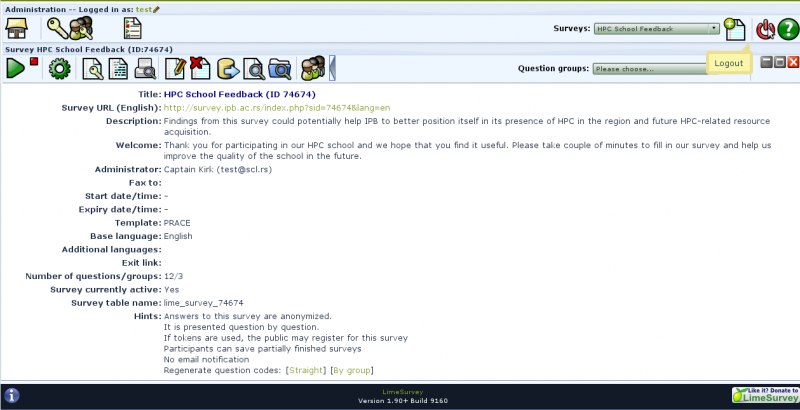
| Short summary of your survey will be presented. Distribute "Survey URL" that you will find in this page to desired participants.
|
|
|
