HP-SEE Survey
From HP-SEE Wiki
(→Filling in The Survay) |
(→Creating Survey Group) |
||
| Line 55: | Line 55: | ||
[[File:SurveyCreateGroup.png]] | [[File:SurveyCreateGroup.png]] | ||
| + | |||
| + | Now you just need to enter group title and description (optional), click "Save" button and you created your first group. Now let's add some questions. | ||
Revision as of 16:16, 8 October 2010
This guide is meant to be used as a quick guide to get you started with creating survey in IPB Survey tool. It will explain how to login and create simple survey, covering several basic types of answer format. If you need a more detailed guide, please visit LimeSurvey Documentation Wiki.
Each survey consists of general description, display settings and, of course, questions. A survey requires each question to be a member of a group (and only that group). It will also describe how to preview your survey and how to publish it.
Contents |
Filling in The Survay
The list of currently active surveys can be found here.
To complete the survey, simply select it in the list and follow the onscreen instructions.
Creating New Survey
For adding new survey or modifying existent survey, you need to visit IPB Survey Admin Page.
Logging in
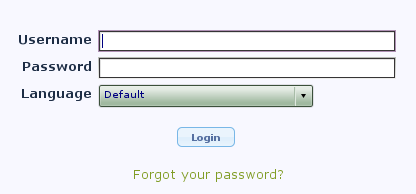
On the first page you have to enter your login information. Here you can select the language in which Survey Admin Tool will be displayed to you. Default language is English (used in this guide).
If you don't have an account yet, send an email to Dusan Vudragovic.
Creating New Survey
Now you arrived at the welcome page from which you can create new survey. Just click on the icon in the right part of the toolbar (as indicated on the picture below).
This click lead you to a page where you can describe your Survey. Survey description is divided in several tabs.
You will first be pointed to General tab where you can enter survey title, description, welcome and end message. Description will be displayed as a heading on every page of the survey (before every question), while welcome and end messages will be displayed on the first and the last page of the survey (respectively). You can also edit information about survey administrator (name and email address) which is set to your information by default.
In Presentation & navigation tab you can tune some settings regarding the way your survey is displayed. Here you can
- select if in one web page you want to display only one question, all the questions from one group of questions or all questions from the survey.
- select the template for your survey. Recommended is to use 'hpsee' template for all HP-SEE Surveys.
- select weather to allow user to save unfinished surveys in order to finish it at later time
- allow user to go back to previous question
- decide on the public availability of survey and survey results
After you described and tuned your survey, you need to click on the "Save survey" button in the bottom of the page.
In case you want to repeat previously conducted survey, with slight changes, or to import survey from file, go to Copy survey or Import survey tab.
Creating Survey Group
Now you can start adding your questions.
You should divide questions of your survey into groups. Questions can be grouped by the theme or you can use this groups structure to select which questions will be displayed on the same web page. It is required that each survey must have at least one question group.
Start by creating the first question group. After you clicked "Save survey" you are now directed to the page where a new toolbar appeared (Survey toolbar). On the right of Survey toolbar, you can click on "Add new group to survey" icon (as indicated in the picture below).
Now you just need to enter group title and description (optional), click "Save" button and you created your first group. Now let's add some questions.


